
What First? Intelligent Vulnerability Prioritisation with blacklens
What first, why, and how? blacklens turns open findings into a prioritised remediation plan – sorted by risk reduction, with context on every finding.
- by blacklens.io Team
- Published
- 5 min read
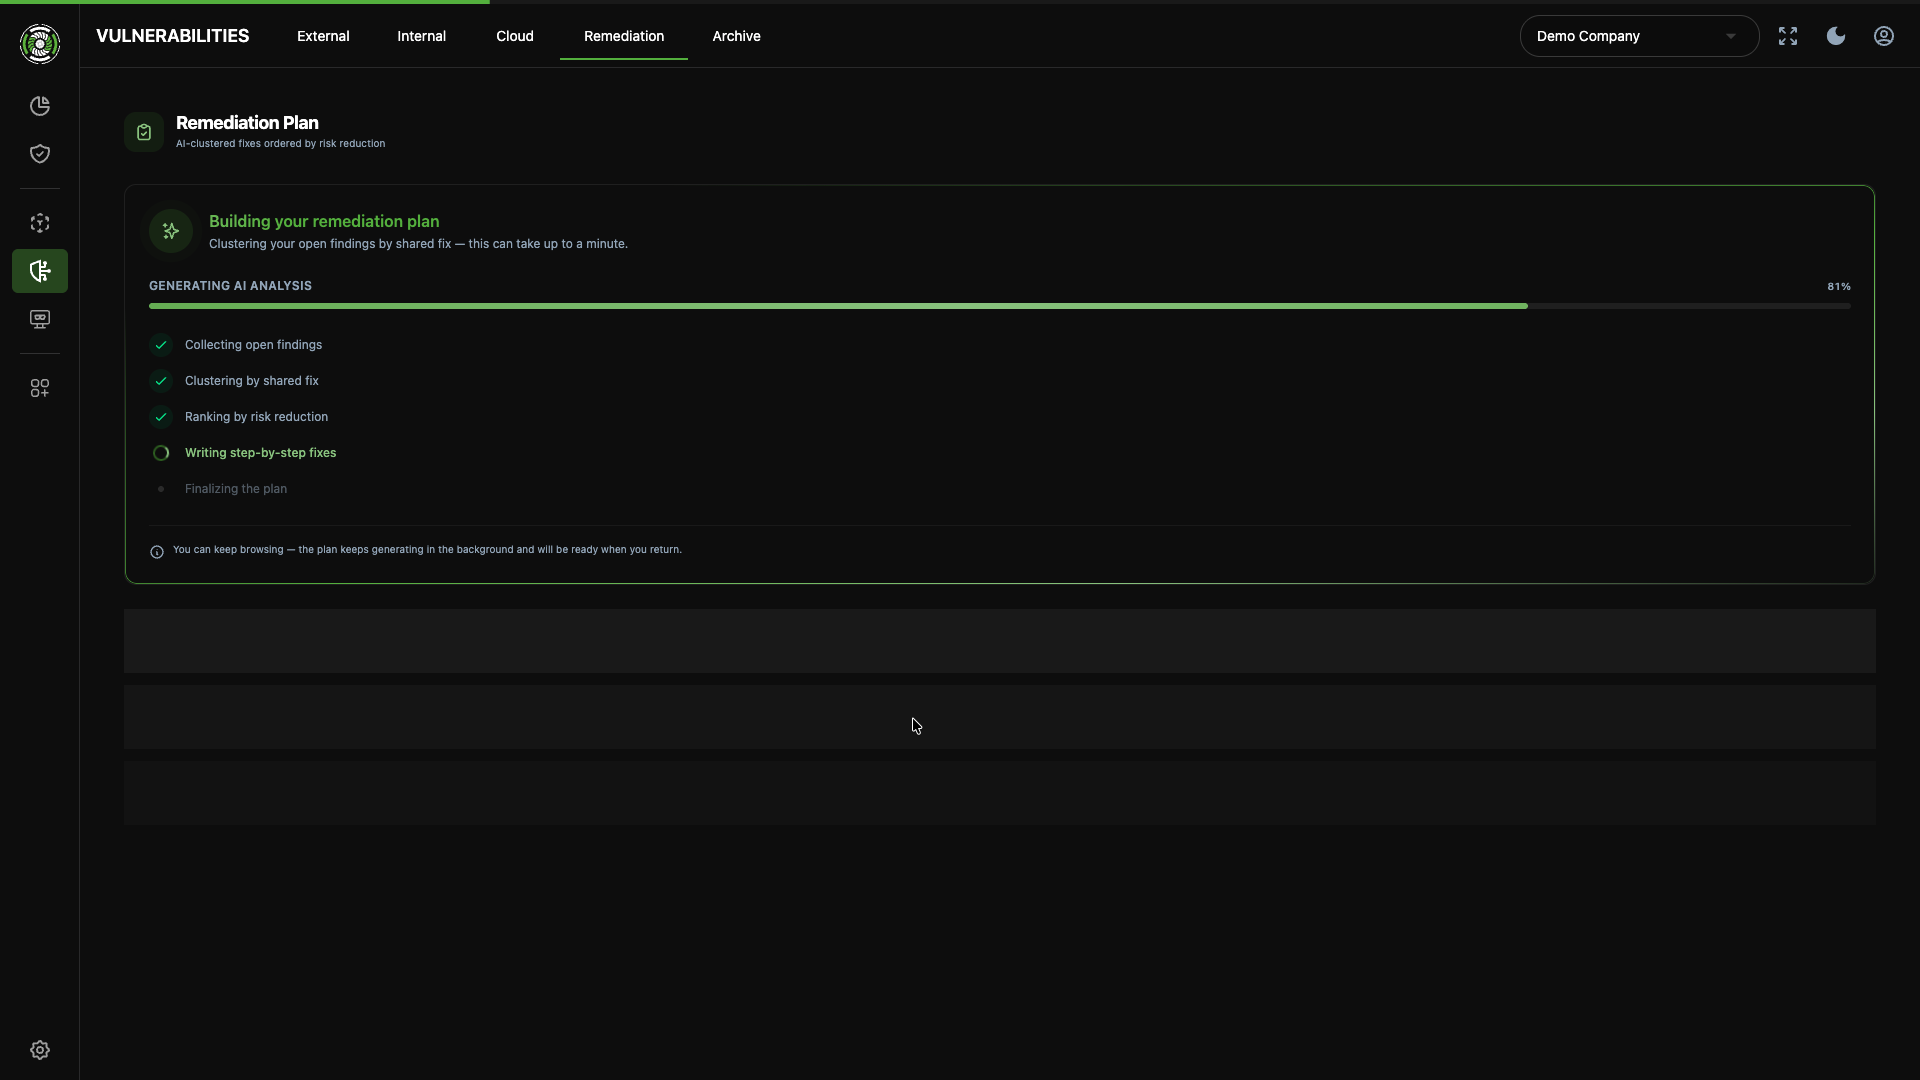
The uncomfortable truth in vulnerability management: the problem is rarely finding vulnerabilities. The problem is spotting, among a thousand findings, the ten that really matter today. Anyone who works through the list by raw CVSS score burns time on findings that will never be exploited – while the one genuinely reachable, genuinely exploitable flaw waits in row 847 of the spreadsheet.
With its latest release, blacklens answers the three questions on which prioritisation really hinges: What first? Why that one? And how do we fix it?
A plan instead of a spreadsheet: the Remediation Plan
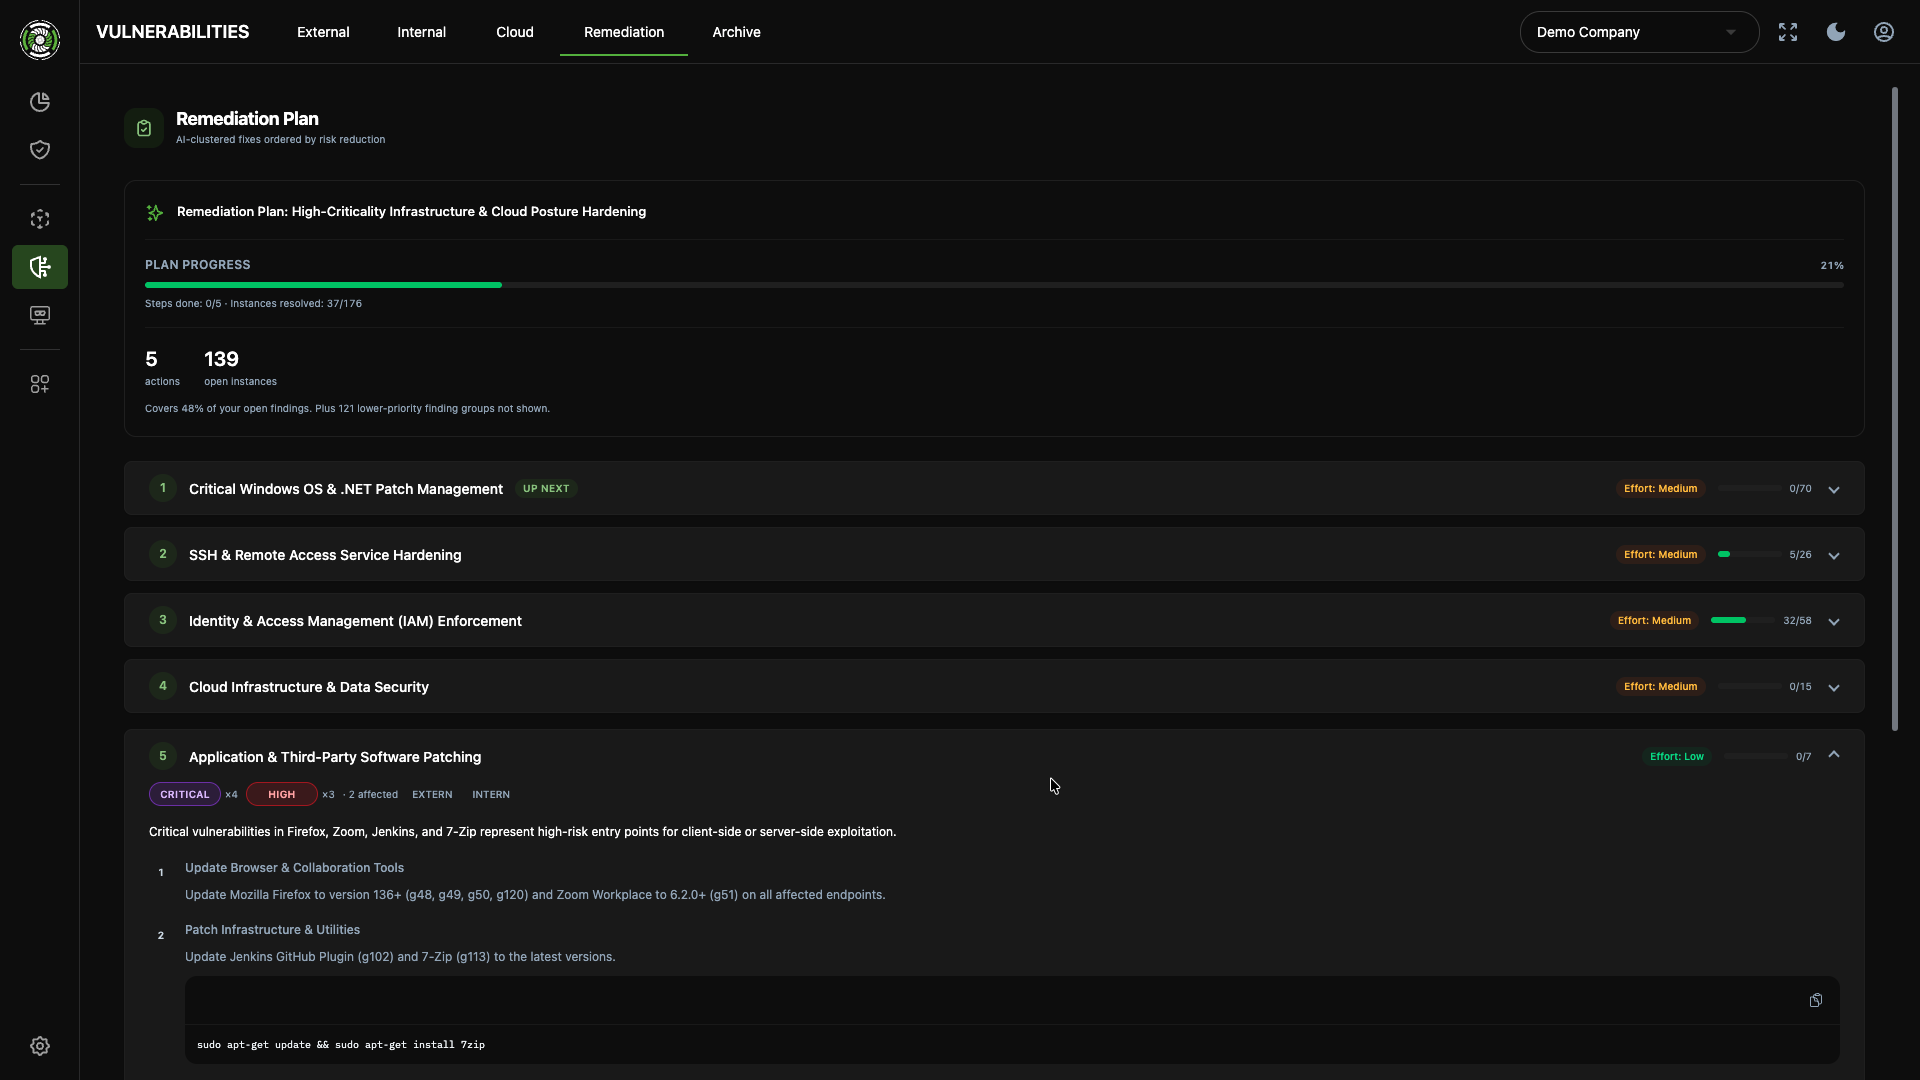
Under Vulnerabilities → Remediation, blacklens generates a prioritised action plan from all open findings at the push of a button – external, internal and cloud considered together:
- Grouped by the fix, not by the finding. An outdated TLS setup on twelve hosts is not a dozen tasks but one. The plan bundles findings by the measure that fixes them together.
- Sorted by risk reduction. At the top sits the cluster with the greatest leverage – by severity and breadth. Not the loudest one, the most effective one.
- With rationale and instructions. Each cluster explains why it sits where it does, estimates the effort (low / medium / high) and provides numbered steps, including copy-ready code where appropriate.
- Progress you can see. While your team works, the plan stays stable – only the counters move: completed steps, resolved instances, coverage of open findings. Right up to "Plan complete — nice work".
Generation takes around 30–60 seconds, and you can keep working in the meantime. The result changes your team's unit of work: no longer "finding by finding" but "step by step" – with visible movement instead of an endless backlog.
Prioritising means understanding: context on every finding
A good order needs good reasons. That is why every finding – external, internal and cloud – gets an explanation layer that makes prioritisation decisions robust:
- Urgency with evidence: A suggested rating along with an exploit status chip – Exploit available, PoC public, No known exploit or Exploitability unknown. The platform severity remains authoritative; the assessment supplements it, it does not override it.
- Threat intelligence per CVE: CVSS, EPSS (probability of exploitation in the wild within 30 days), exploit/PoC availability, attack vector and advisory link – from the blacklens threat feed. Exactly the data you need to tell "high" from "urgent".
- Root cause, impact and remediation: Why the finding exists, what it exposes and how it is closed – in 1–6 concrete steps. Plus compensating controls for the realistic case that the actual fix has to wait.
- Follow-up questions right on the finding: A chat beneath the analysis answers follow-up questions in the real context of your workspace – the actual service fingerprint, the affected hosts, the same finding on other systems.
The analyses are generated on request, cached transparently with a timestamp and visibly carry a note to review generated content before taking critical steps. The decision stays with your team – it just gets considerably faster.
Prioritisation beyond the CVE: which lookalike domain is dangerous?
With typosquatting, too, the question is never "are there lookalikes?" but "which of them is a problem?". The new detail view provides the basis for that decision: a character diff against your domain, registration and DNS data, a reputation score – and risk badges such as Mail capable that show at a glance whether a domain has everything credential phishing needs.
On demand, blacklens goes one step further: it captures what the domain actually serves, including a screenshot, and assesses whether it imitates your brand. Evidence and assessment stay cleanly separated: Observed on the page lists objective signals extracted by blacklens itself – a password field, the brand name, a form posting to a foreign domain – while the Assessment is the interpretation. Only once the evidence is complete (the checklist shows 5/5) is the Draft abuse report unlocked: a pre-filled, factual email to the registrar's abuse contact. Sending it is up to you.
Getting to the right view faster: ask instead of building filters
Prioritisation often starts with a simple question: "Show me critical findings on prod hosts." That is exactly how you can ask it now – on 17 dashboard lists, blacklens translates the description into a ready-made, editable filter query with a preview. The language model never sees your data at any point, only field names, types and permitted values – and nothing runs until you click Apply filters.
Complementing this is the new status strip above every attack surface list: five metrics per page – such as Exposing, Vulnerable, High risk – many of them clickable as filters. And a principle we like to quote: Unknown never counts as safe. Tiles such as Public or No MFA only count what a provider has explicitly reported.
On your terms
The intelligent features of this release – Remediation Plan, finding explanations, domain verdicts, natural-language search – are opt-in per workspace and switched off initially after the update. Workspace admins decide under Settings → General → AI Features, and "off" means off: the server rejects such requests for deactivated workspaces. The analyses run on our self-hosted LLM and are GDPR-compliant – your data never leaves our infrastructure.
Conclusion
Less time sorting, more time fixing: this release turns the flood of findings into a reasoned order – a plan with the greatest risk leverage at the top, context and threat intelligence on every finding, evidence instead of gut feeling for lookalike domains. The intelligence lies in the prioritisation. Control stays with you.
Get started: Workspace admins enable the features under Settings → General → AI Features. After that, your first Remediation Plan is waiting under Vulnerabilities → Remediation.
Frequently asked questions
- The Remediation Plan, found under Vulnerabilities → Remediation, turns all open external, internal and cloud findings into a prioritised action plan at the push of a button. Findings are grouped by the fix that resolves them, sorted by risk reduction and delivered with a rationale, an effort estimate and numbered steps, while progress counters update as your team works through the plan.
More articles

FortiBleed: When Tens of Thousands of Firewalls Become an Open Door
FortiGate firewalls exist to protect corporate networks. FortiBleed shows what happens when the firewall itself becomes the attack surface – and opens the door.
- 3 min read

Access Broker Economy: When Network Access Is Sold on the Dark Web
Ransomware attacks rarely start with the ransomware. They start with a compromised account or stolen credentials – sold on by Initial Access Brokers.
- 2 min read

Dark Web Monitoring: An Indispensable Tool Against Cyber Threats
Discover how blacklens.io uses dark web monitoring to detect cyber threats early and protect companies from attacks originating in the darknet.
- 4 min read
See your attack surface within 24 hours.
We set up your workspace and walk you through the first findings.
- 14 days free, all features
- No credit card required
- We walk you through your first findings